Send to E-Mail will send the backup file to an email address. You can pre-define this email address in Settings > Default Destination E-Mail Address.


Note: Some email services don’t support large attachments. If this is your case then you can use Send to Dropbox or Send to iTunes.

Send to Shared Folder will send the backup to the Quick Sale shared folder. Use iTunes to transfer the file to your computer.

Tap here to open the backup panel

iTunes shared folder contents

Tap here to open the Restore popover

Tap here to restore from the selected restore file

Backup

Restore

Backup to iTunes: Copy the backup file from the iPad to a computer

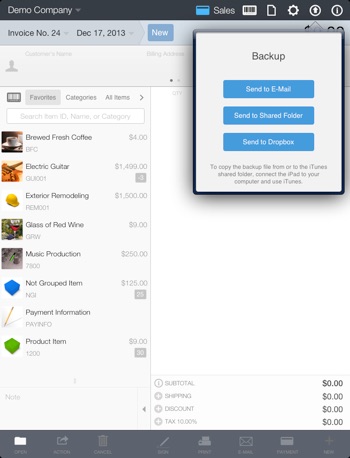
Note: You can also send the backup to your email or Dropbox to avoid this step.


1) Connect your iPad to your computer with the USB dock cable and launch iTunes.

2) Select your iPad from the Devices list in the iTunes Library column, then click the Apps tab (right side).

3) Scroll to the bottom of the iTunes window to see the File Sharing area.

4) Select Quick Sale (left side of the File Sharing area).

5) Select the file that ends in .QuickSaleBackup and click the Save to... button

  1. 6)Select the location on your computer where you want to save the file and click Choose

Copy the backup file from a computer to the iPad for restoring

  1. 1)Connect your iPad to your computer with the USB dock cable and launch iTunes.

  2. 2)Select your iPad from the Devices list in the iTunes Library column, then click the Apps tab (right side).

  3. 3)Scroll to the bottom of the iTunes window to see the File Sharing area.

  4. 4)Select Quick Sale (left side of the File Sharing area).

  5. 5)Drag the backup file that ends in .QuickSaleBackup and drop it on top of the Quick Sale document's area (right side)

or:

  1. 5)Select the Add button and choose the backup file.

  2. 6)There is no need to sync.

Important:

Backing up to the Shared Folder will store the backup file on the iPad.

If Quick Sale or the iPad contents are deleted then the backup file will be deleted as well.


If you use the Send to Shared Folder option then make sure that you transfer the backup file

to your computer using iTunes.

Restore from E-Mail

  1. 1)Open the iPad’s Mail app

  2. 2)Locate and select the email with the backup file

  3. 3)Tap on the icon of the backup file attached to the email

  4. 4)Select Open In “Quick Sale”

  5. 5)Quick Sale will open automatically, select Settings

  6. 6)Select Restore

  7. 7)Choose the backup file and press Select


Important: The backup file will replace all the data from the current open company.

Restore from Dropbox

  1. 1)On the iPad open the Dropbox app

  2. 2)Locate and select the backup file

  3. 3)Tap on the action menu (top right) and select Quick Sale

  4. 4)Quick Sale will open automatically, select Settings

  5. 5)Select Restore

  6. 6)Choose the backup file and press Select


Important: The backup file will replace all the data from the current open company.

Backup & Restore

Transfer your data from Quick Sale Pro Lite

You can transfer a full backup of your data from Quick Sale Pro Lite to the paid version by doing the following:


  1. 1)Open Quick Sale Pro Lite and tap the Backup option

  2. 2)Select Send To Quick Sale (see image).

  3. 3)An "Open In" popup will appear and select Quick Sale

  4. 4)Quick Sale (paid version) will open automatically

  5. 5)Switch to "My Company" (or to an empty company) then go to Settings and tap Restore

  6. 6)Choose the backup file and then tap Select

Send to Dropbox will send the backup to the dropbox folder designated for backups. Change the default folder in Settings > Configure Dropbox.

Tap here to open the Settings